Connecting to AirComfort using Cured Meat App
- Download App by scanning this QR code

Or for Android users click here, for iOS users click here.
- Open Wireless communication in your phone.
- Turn on Location and Bluetooth.
- Launch the CuredMeat App.
.png)
- Login using your ibebot Dashboard+ credentials (AirComfort Cloud Storage).
.png)
If you don’t have Dashboard+ account yet click Register button in the App or you can register on this link.
- Click the Add (+) button.
.png)
- Click the AirComfort.
.png)
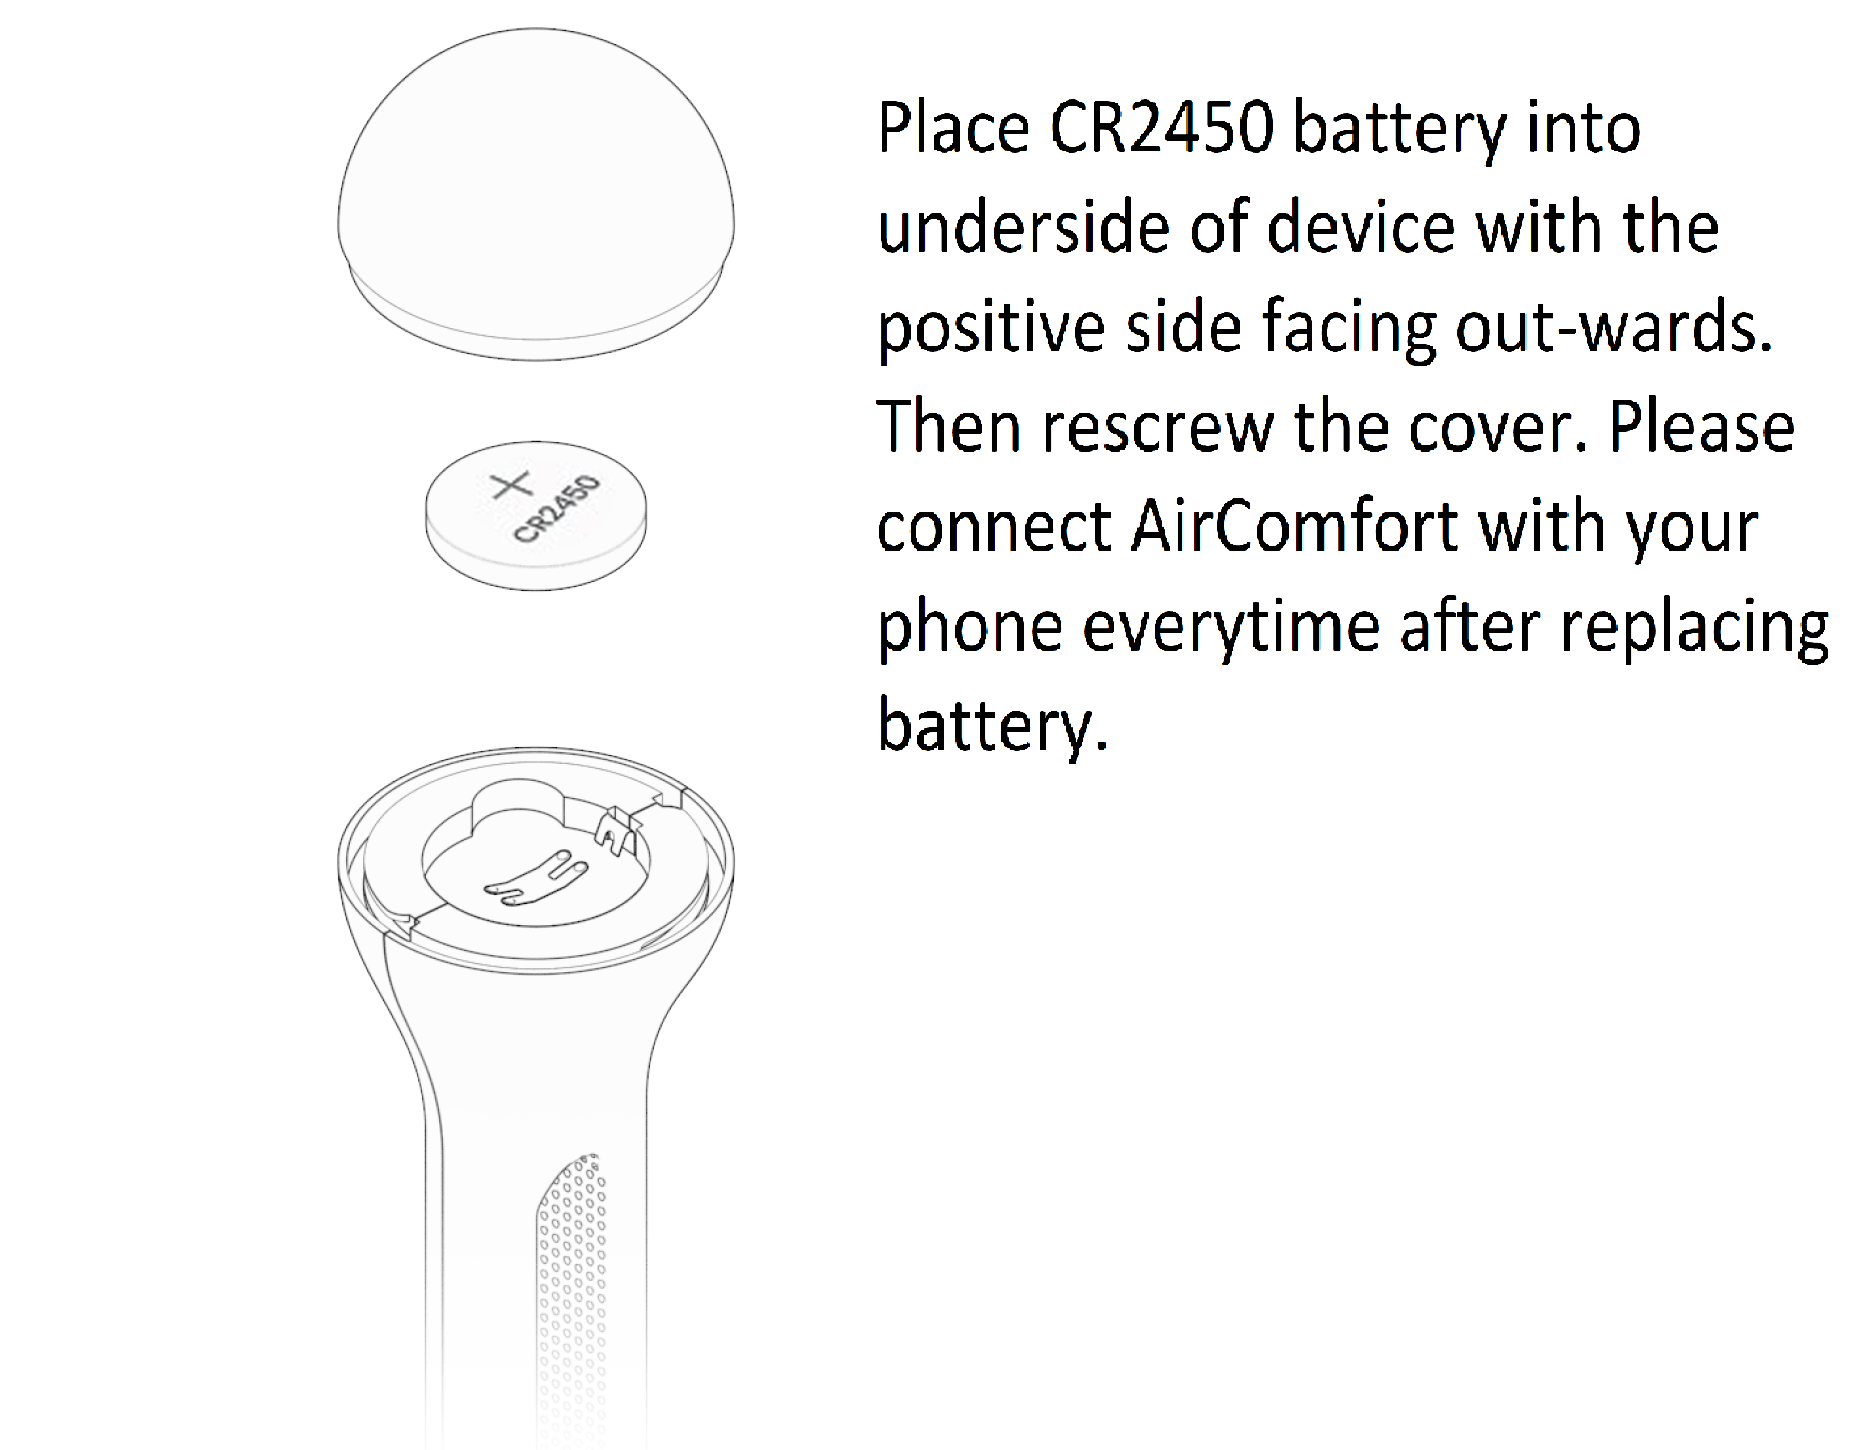
- Please follow the correct inserting of battery of the AirComfort device as seen in the picture. Then click the Next button.
.png)

- Wait for the device to be detected then click Next button.
.png)
.png)
- Input your desired sensor name then click the Save button
.png)
- Click the Start button. Wait a few minutes for the sensor to sync data completely.
.png)
- If your device is brand new, you might not yet see a graph as no records has been captured yet. You can refresh again the sensor a few hours later to sync and see graph showing.
.png)